Showing posts with label Kitchen 101. Show all posts

Sunday, March 16, 2014

Kitchen 101: How to Shred Chicken with Minimal Time and Effort

I'll never make chicken salad the same way again.  Ever.  Or anything else that requires shredded chicken, for that matter.


Meet Idris.  Yep, I finally got one - a KitchenAid mixer.  After years of hemming and hawing over whether it was worth the hefty price tag, and my other stand mixer that-shall-not-be-named finally kicking the bucket, I got a lovely refurbished unit for Christmas.  (I could not bring myself to ask for a new unit - not when my refurb food processor has kicked serious culinary booty for me for some time now.)  And yeah, I have to say, in the short time I've had my baby, she's worth every red cent.  But this is not meant to be a bragfest - it is to say, stand mixers are useful kitchen tools and can do the best kitchen hack for poultry lovers.

It will shred your chicken.

Okay, so it doesn't seem to be the end-all, be-all, some of you think I was building up to, but!  It means lots of time and effort saved, not to mention, avoiding the accidental wince of burning your fingers on hot, hot chicken.  I may or may not have done that several times in my kitchen career.

After cooking your boneless chicken breast with your preferred method (steaming, poaching, etc.), cut the still hot meat into 3-4 pieces and place it into the bowl of your mixer.  Affix the paddle attachment, lower the head, lock in place and start it up.  I work my way up to Speed 4 on my KA, and in a few seconds, I have shredded chicken.   Freshly cooked chicken tenders buzz up super quick.

Now don't think you are left in the cold if you don't have a stand mixer.  I haven't personally tried this yet, but from what I have read, a hand-held electric mixer will do the same helpful trick.  I would probably cut my chicken into more pieces before trying this out.  If you do happen to try it out with a hand-held mixer, please, by all means, report back on your findings!

Monday, July 16, 2012

Dress for Success

  Your salad, that is.  Salads are extremely popular in the summer months, as there is no need to heat up the kitchen to make one.  Me, personally?  I love 'em any time I can get my fork in one.  But that said, not every salad is fantastic, but a few things to keep in mind will circumvent a soggy, wilty mess.

  Perk up lettuce with cold water.  That lettuce in the crisper not quite so crisp?  Fill up your clean sink with cold water and give the leaves a soak.  It'll wake up your greens.  But...

  Dry lettuce is happy lettuce.  Make sure your lettuce is dry before making the salad.  Salad dressing sticks best to dry leaves, leaving you with a better coating with less dressing.  Excess water will also water down any dressing you add.  If you are a serious green grazer, consider investing in a salad spinner.

  Don't stash your tomatoes in the fridge.  The tomatoes will get a mushy texture that is less than appetizing.  But...

  Do consider stashing salad plates in the refrigerator.  It'll help lettuce, especially the delicate types, retain the crispness.

  Now that we can build a good proper salad, how about making some dressing?  Homemade dressings are easy, fresh, and tasty.  This one is from the Tupelo Honey Cafe, based out of Asheville, North Carolina.  The hardest part is simply waiting on the pecans to toast.  I love it on a spinach salad!

Pecan Vinaigrette
Yields 2 cups of dressing, about 16 servings

Ingredients
1/4 cup pecan pieces or halves
1/4 cup apple cider vinegar
1 clove garlic, minced
2 1/2 teaspoons Dijon mustard
2 1/2 teaspoons whole-grain mustard
1 1/2 tablespoons honey
2 teaspoons sugar
1 teaspoon sea salt
1 teaspoon freshly ground black pepper
1 cup canola oil
1/4 cup extra-virgin olive oil

   First we're going to prep the pecans.  Preheat your oven to 350°F.  Spread the pecans out on a baking sheet, and roast the nuts for about 20 minutes, or until the pecans are toasted and slightly browned.  You will smell the pecans when they are ready - watch them carefully close to the end, because you can burn them.  Set them aside to cool.  Once they are cool, grind the pecans in a food processor until it looks like coarse breadcrumbs.  Empty the ground pecans into a small bowl.

  Next, to the food processor, add the vinegar, garlic, both mustards, honey, sugar, salt and pepper.  Puree the ingredients.  While the processor is running, drizzle in the canola and olive oils slowly.  Pour into a container, and stir in the ground pecans.  You can stash this in your refrigerator for up to 30 days.

Note: I put my dressing in a Mason jar.  I dump the ground nuts in the bottom, pour the dressing over it, seal and shake.  I'm all about the easy.  *winks*

Saturday, May 5, 2012

Weighty Matters, Part II: Consider the Scale

  There are many makes and models to choose from when shopping for a scale.  The most common types on store shelves are spring scales and digital scales.  My money is on the digital variety.  Spring scales are easy to use, but some of the spring type may have difficulty registering small amounts of ounces or see more wear and tear on parts versus the digital scale.  Spring scales may be cheaper, but consider the features available on digital scales.  Today's digital scales can have handy functions like metric-customary conversions, fraction-decimal conversions, or even some models may have the specific feature of measuring liquids based on a liquid's unique density.  While each cook will need to decide what is important for them, I ultimately look to three major factors - tare functionality, sizeable maximum weight, and accuracy,
  The tare function is a great feature that extremely useful.  Taring sets the scale back to 0.  This aspect will allow you to ignore the heft of mixing bowls or weigh individual ingredients as you add them in. 
  Another consideration when choosing a scale would be the scale's maximum weighing capacity.  With a large enough max load, you don't have to weigh ingredients before adding them to a bowl; you could put the work bowl on the scale and weigh as you go.  Think about the size of your work bowls - the scale will bear them along with the recipe elements.
  Accuracy.  There's no point in owning a scale if it doesn't work properly.  This is why I like digital scales - accurate and I don't have to adjust anything.  I'm a klutz, so I avoided a manual scale I could blunder with.  Also check to make sure you can read the output.  Tools are to help, not make things more difficult. 

Thursday, April 26, 2012

Weighty Matters, Part I

  Meet Escali.  Escali is strong...nicely built...handsome...intelligent...precise...helps me in the kitchen.  The perfect partner, really.  I am in love.

You wanna meet him, don't ya?


Huh?  What were you thinking about?!  Escali is my kitchen scale.

  I hope to expound upon something I wrote earlier on this blog and on various food forums in the past about measuring ingredients, and the difference between volume and weight. Most American recipes are written with the ingredients doled out by volume, compared with much of the rest of the world that measures by weight.  Some attribute the deviation to early settlers using what was on hand, which more often than not, included teacups and the like, but no scales.

  Many cooks swear by using weight instead of measuring by volume.  Some of the benefits are:
  • Consistent results each time a dish is made.
  • Baked good especially benefit - factors such as humidity or how tightly the flour is packed into a cup can cause variances in the amount that goes into a recipe.
  • Less equipment used and dirtied up during prep (or mise en place, if you please.)
What IS the Difference?

  Now you've thought about some of the advantages, what exactly is the difference between volume and weight?

  Volume, quite simply,  is how much space something takes up.  Weight, on the other hand, is how much an object weighs - how heavy, how much mass it has.  These two properties aren't exactly the same, and this can be seen particularly with dry ingredients.  A cup of shredded cheese does not weigh 8 ounces like a cup of water.

  Really!  I'll prove it.
 The same cup filled with water would have the same volume (space), but different weights (quantities of mass).  That 2 cup package of pre-shredded cheese in your fridge weighs 8 ounces.  In fact, I've found most cheeses -harder, shreddable, sliceable, crumbly varieties- are half the weight of the volume you'll need to shred or crumble.  [i.e. 3/4 cup shredded cheese takes up the same volume as 6 ounces of water is 3 ounces of cheese in brick form.  Handy to keep in mind while shopping.]  Frequently on my recipes, I'll try to include weights in parentheses along with the more traditional volume measurements.

Next time, Weighty Matters, Part II: Consider the Scale


Thursday, June 16, 2011

Kitchen 101: Ice Cream & Frozen Desserts

  Yes, true believers, there's more to ice cream than cruising the freezer aisle at your local grocery. (Bonus points for identifying who calls fans "true believers"!)   If you start looking at the various cartons and food trends, lots of terminology comes to light - ice cream, ice milk, gelato, sherbet, sorbet... it's enough to make your head spin.  But it all boils down to a few definitions, mainly determined by ingredients and fat content, which may be helpful if you venture out into making your own frozen confections.

Ice Cream - By definition, ice cream is a frozen dairy product with a minimum 10% milk fat content.

Philadelphia Style -  This mixture has no eggs in the base.  These are quick to put together, but since they have no eggs in the recipe, this kind of ice cream will freeze harder than a custard base.  You may see this kind of ice cream referred to as New York or American-style as well.

Custard -  This ice cream has a base that has egg yolks or whole eggs in the recipe, and the base is cooked before frozen.  The trick with this type of ice cream is to temper the eggs during the cooking process and strain to ensure no cooked egg pieces end up in your ice cream.  Custards can also be called French-style ice cream.

Ice Milk -  Similar to ice cream, but has less milk fat (3-6%).

Frozen Yogurt - Pretty much what it says it is - sweetened flavored yogurt that has been frozen.

Sherbet - Usually mainly made of fruit/fruit juices, it has a small amount of dairy (1-2% milk fat.)

Sorbet - Another fruity frozen dessert, but contains no dairy at all.

Gelato - There is no legal American benchmark for gelato, so be advised any ice cream or flavored ice can be labelled gelato in the US.  The term is Italian and is distinctive from American desserts because it doesn't contain as much air (or "overrun"), therefore a more dense dessert.

Granita - A dessert ice that is more coarse than sorbet.  Most granitas are made from fruit juice, but you can find coffee and wine granitas, as well.

Overrun - Overrun is the air that is whipped into the ice cream base as it freezes.  The less overrun an ice cream contains, the more dense it is.


Ripen -  This is done with homemade ice cream before serving that keeps it from melting so quickly, and take the texture from soft-serve to firm.  Simply transfer the ice cream from the machine into an air-tight container and freeze for a few hours before serving.

Sunday, November 21, 2010

Kitchen 101: Seeding a Pomegranate

  It was in Mrs. C's 7th grade reading class I had first heard of this 'exotic' thing, the pomegranate.  We were studying Greek mythology.  There's a story that explains the change of seasons - it had all the elements of a good read: a mother whose love transcends everything, a dark stranger, forbidden desire, and food.  Well, okay, maybe it wasn't a stellar read by our standards, but it stirred base emotions.  Demeter, goddess of fertility and vegetation had this beautiful daughter, Persephone.  Now we all know, that's a curse of doom for women - the Greek gods just could not resist a good lookin' woman.  Many tried to court Persephone, but Demeter didn't think any of them were good enough for her girl.  No sir.  None of 'em.  So, Demeter hid her off and left her picking flowers in the meadow, oblivious and innocent.  Bam!  The earth opened up and Hades, god of the underworld, erupted forth on his chariot, stealing away Persephone.  Demeter launched a full-scale search, and in her anger and sadness, the crops withered.  Eventually, Zeus grew tired of the mortals' cries of hunger and sent Hermes to fetch Persephone from Hades.  Wouldn't you know it?  Persephone had gotten hungry herself, and Hades tricked her into eating seeds from the pomegranate.  While she would return to her mother, she would come back to reside with Hades a month for each seed she ate, giving the world seasons.   Interesting story, but no way I could just pop a few seeds and be satisfied.  Poor girl must have been a twig.

  Pomegranates are an intriguing fruit - you eat the seeds, better known as arils.  They pop with a tangy, sweet and sour juice.  To harvest the arils, be prepared for some tricky business - but there is a way to do it with minimum fuss.

You'll need a cutting board, knife, a big bowl filled with water, colander, and some paper towels.

  Start off by finding the crown, the part of the fruit that looks like Jughead's hat.  Trim off the top 1/2 inch.  You will get a little juice spurting out on the cutting board.  Turn the pomegranate around, and trim off the bottom 1/2 inch.  You'll see parts of the aril pockets hidden inside the white pithy insides.  Take the knife and score sections all around the fruit, going from top to bottom.  Put the scored pomegranate in the bowl of water, and carefully start pulling the fruit apart, working underwater. 

Here's my pom after I pulled it into two halves.

 Working with a section at a time, take your fingers and work out the arils from the white part, again in the water bowl.  You'll see the white pith float to the top and the arils will sink to the bottom.  After you've freed all the arils, skim the top with a spoon or just pick out the stuff that's floating.  Pour the water and arils into your colander to drain.  Spread them out onto paper towels to dry a bit.  Move them to a plastic container, topped with a paper towel and seal.  Stash in the refrigerator, and these lil' rubies should last for 7-10 days.


Wednesday, October 27, 2010

Kitchen 101: Roasting Garlic

Ah, the Stinkin' Rose, and just in time for Halloween, to boot.  Garlic has a way of, shall we say, making an impression.  Me?  I love the stuff anyway I can get it.  But if you don't care much for garlic's pungency, try roasting it.  It brings a mellow and slight sweetness that is just heavenly - a contrast to the sharp bite of raw garlic.  Roasted garlic is versatile and downright tasty spread on toasted French bread.  And roasting is too easy not to give it a try.

For the tools of the trade, you'll need a head of garlic, olive oil, and aluminum foil. 

A head of garlic?  Sometimes it's referred to as a garlic bulb, covered in several papery layers of skin, a bit like an onion.  The small, individually wrapped nodules that compose the head are called cloves.  Got it?  Great!

For what we are doing today, we need to keep the head intact.  With a knife, cut off the top 1/4 of the head, exposing the clustered cloves inside.


Tear off a square of aluminum foil, and place the trimmed head in the middle.  Drizzle with just a little olive oil.


I find that olive oil from a cat dispenser tastes the best....but I'm weird that way.  (All kidding aside, the opaque container does protect the oil from light.)

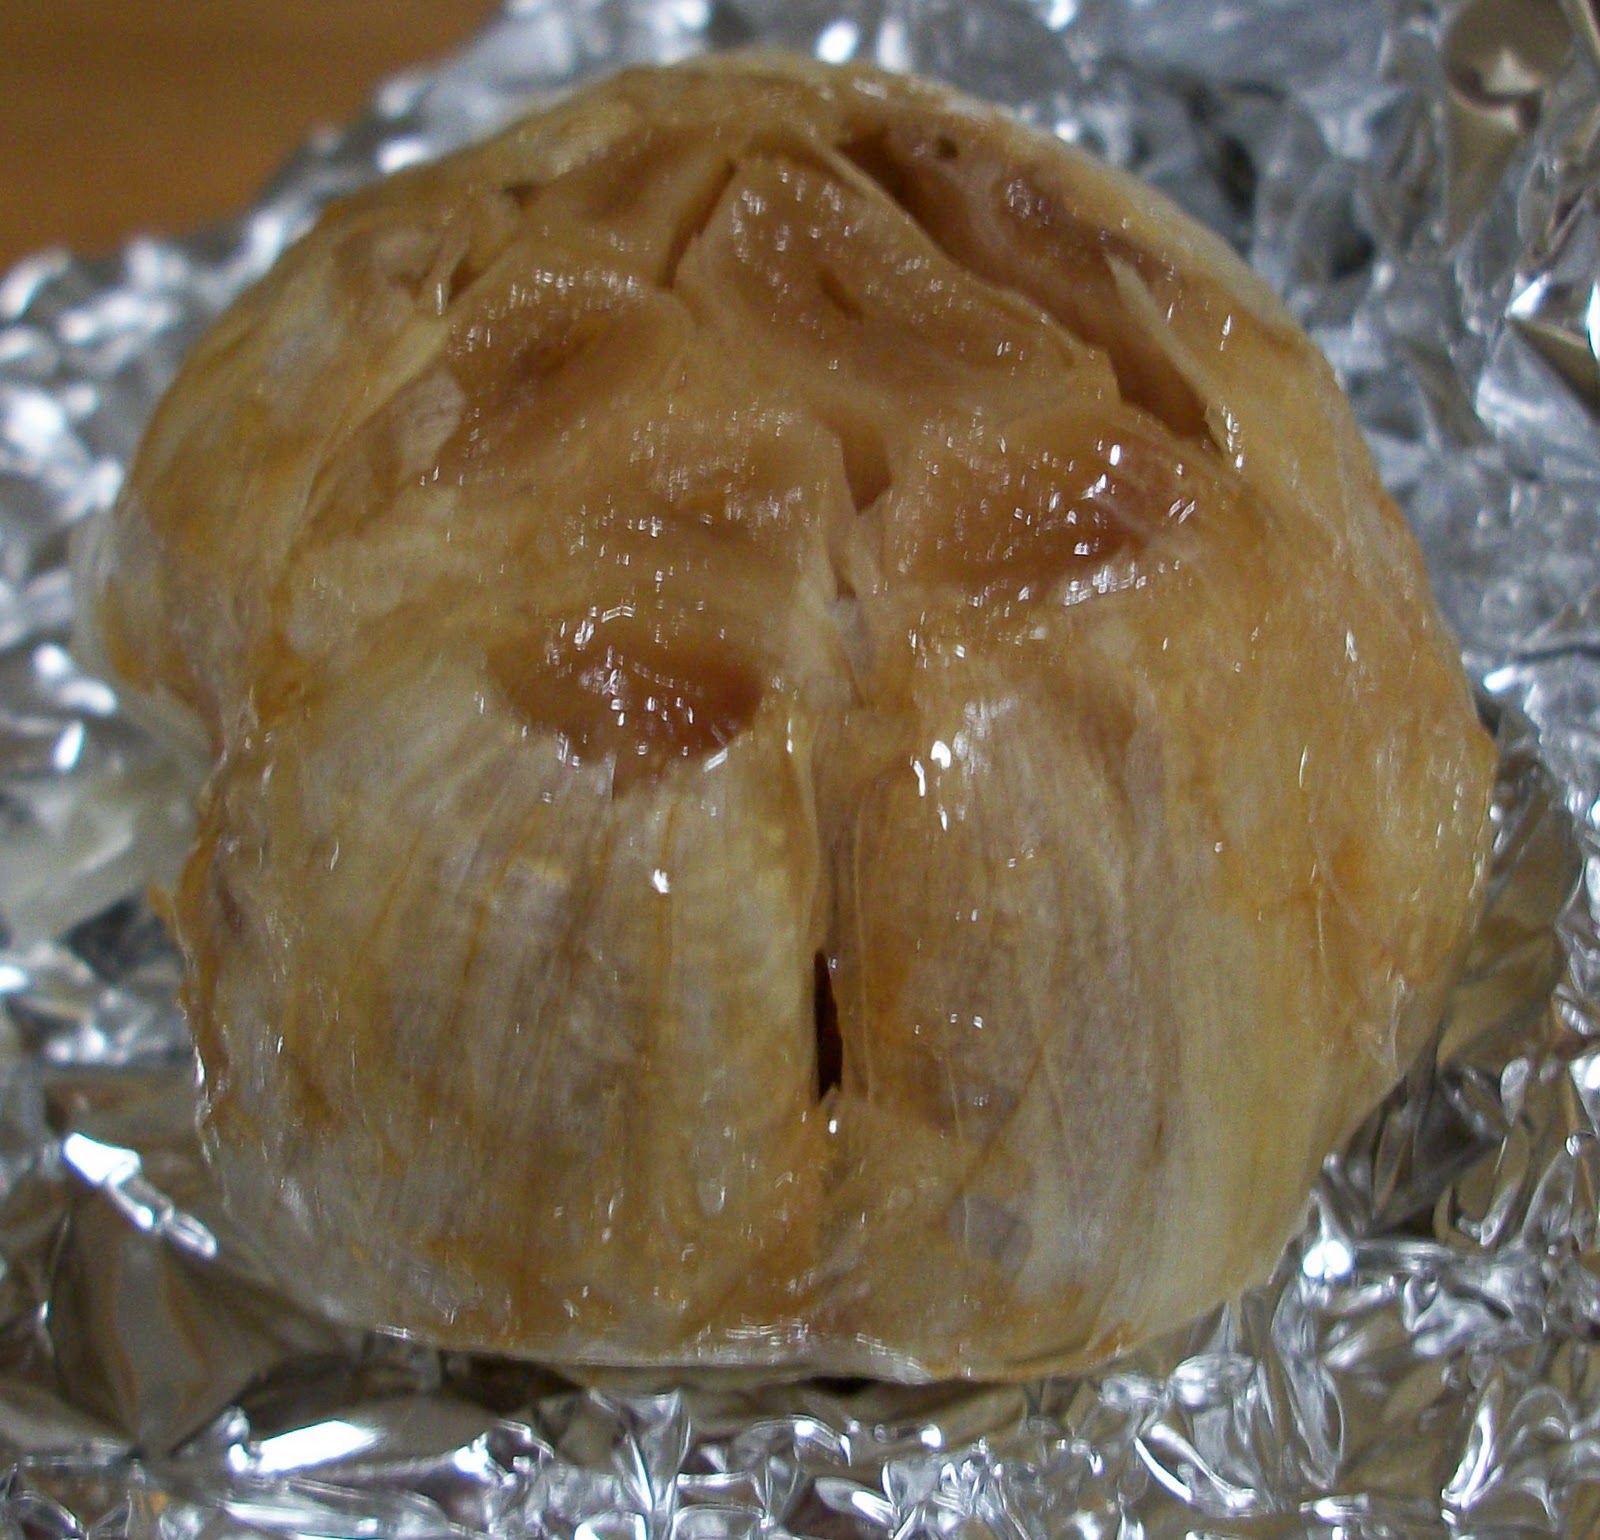
Wrap your garlic up tightly in the aluminum foil and pop into a preheated 350°F oven.  Bake for about an hour.  Remove and once it's cool, unwrap the head.  The cloves will be caramelized and brown in color.  The garlic has taken on a more mellow taste.  To remove the garlic, squeeze the head and the softened garlic will come out.


What's it good for?  Lots of delicious options - add it to mashed potatoes, make a garlic seasoning paste, squeeze it straight from the bulb and spread on toasted bread, and one of my favorite ways to use it is in a salad dressing.  And the roasting process I gave you is very flexible.  If I've got the oven going for something else - say baked potatoes- I just toss my foil wrapped garlic in on the rack to take advantage of that heat.  Cooking at a higher temp than 350°?  Just start checking your garlic at an earlier time.  I usually run about 30-45 minutes in a 400°+ oven for roasting.  Multiple heads going?  I've read other blogs where crafty cooks use a muffin tin and cover with foil; you don't have to retrieve multiple foil packs that way.  Just make sure to store leftovers in the fridge, covered with a bit of olive oil, and use within a few days.

Monday, July 5, 2010

Kitchen 101: Non-reactive & Reactive

  It's hot outside, it's hot inside (AC isn't working).  So since I don't even want to think about food and potential heat sources, going to switch gears for a second and introduce a new category of posts - Kitchen 101.  Stuff that we should all know or learn to make life easier in the kitchen.  Some of this, I'm learning along with you folks.  The more cookbooks I read, the more new words, ingredients, & techniques I'm introduced to, and sometimes, they're just thrown out there and it's assumed the reader knows what it is.  Thank goodness for the interwebs, right kids?

  Today, let's dish about cookware.  Occasionally you're going to see the words "non-reactive" ____________ (insert skillet, bowl, pan, etc. here) in a recipe.  What does that mean?  Time to take a field trip back to science class - it comes down to chemical reactions.  Don't worry, I'm going to gloss over the technical stuff - but it boils down to mainly acidic foods reacting with certain metals, which will in turn change the taste of your food, and not in the way you want it to.  Non-reactive cookware will not cause that chemical reaction. That doesn't mean you need to root through your cabinets and toss anything considered reactive.  It just means we need to use a little knowledge on when to use them, and when to pull out the non-reactive stuff.   

What's Non-reactive?  What's Not?

  Non-reactive cookware is a pretty broad category that includes non-metallic and metallic materials in it.  Some prime examples of prep and cooking tools that are non-reactive are made of clay, stoneware, silicone, plastics, enamel, glass, and stainless steel.  But stainless steel isn't the best metal for even heating, so sometimes these pieces may have an aluminum or copper bottom bonded to them.  As long as the surface the food touches is stainless steel, it's non-reactive.

  Reactive cookware is primarily made up of copper and aluminum, and includes cast iron.  They are really good at heating up and retaining heat, but they react with acidic foods.  This can give food a metallic taste or discolor it.  That also means you shouldn't be storing your food in containers with these materials.  (If you are stashing your leftovers in your cast iron pans, you need to be fussed at - you're killing your seasoning and promoting rust!)  Copper pots may have a tin coating or lining to keep the cooking surface non-reactive, but as soon as the tin is scratched, your pot now has reactive spots.  Cast iron is reactive, but if you've got a good seasoning on it, you should have no trouble cooking tomato-based and other acidic foods in it, as long as you don't let the food linger around.


When Should I Use What?

Non-reactive - Use it for marinades, vinaigrettes, acidic foods like tomatoes, light colored soups or sauces to avoid discoloration (that means no aluminum whisks for stirring, too).

Reactive - Good for general cooking.   Don't forget about our note on cast iron - tomatoes are okay if you've got a thick seasoning on the pan, and you don't let the food sit around in the pan for a long time.  Just don't get any funny ideas to use it to marinate stuff in it.