Monday, December 13, 2010

Pizza Dip

Here's an easy tried and true recipe I need to pull back out for Game Night at our house soon.  Make sure you serve this with some hearty crackers or breadsticks!

Pizza Dip
Serves 10

Ingredients
8 ounces cream cheese, softened
1 teaspoon Italian seasoning
1/8 teaspoon garlic powder
2 cups shredded mozzarella cheese (8 ounces), divided
1/2 cup pizza sauce

  Start by preheating your oven to 350°F.  Using an electric mixer, combine the cream cheese, Italian seasoning, and garlic powder.  Beat until well-blended.  Spread the cream cheese mix on the bottom of a 9 inch pie plate.  Top with 1 cup of mozzarella, spread on the pizza sauce, and sprinkle on the remaining cheese.  Bake for 15-20 minutes, or until the cheese is melted and everything is heated through.

Tip - Feel free to add in your favorite pizza toppings to customize this dip to your tastes.  I'd put them on top of the pizza sauce before the final layer of cheese.

Sunday, December 5, 2010

Stuffed Mushrooms (like Olive Garden's)

  When I was in high school, we took a family vacation to Disney World.  On the drive home, we stopped in Lakeland, Florida to eat dinner at the Olive Garden.  Mom ordered one of those appetizer samplers where you could pick three things.  I remember the platter being placed on the table, and looking at Mom sitting across the table, telling us what she ordered.  My brother, who was in elementary school at the time, looked at me and we started to add things to our plates of things to try - there was fried zucchini (oh, how I love thee...), fried mozzarella (I still contend cheese is a most perfect food), and stuffed mushrooms.   I had no idea those little suckers could taste so good.  But they did.  It was one of those tastes that haunts a mushroom lover; randomly in the years after that trip my mom, my brother, or I would just be hit with a craving for those mushrooms.  Being a good hour and half away from the nearest Olive Garden, it wasn't something easily rectified.

  While hunting for a different stuffed mushroom recipe for Mom, I ran across this one.  This recipe is floating around on many cooking websites online, and with excellent reason.  This copycat recipe produces the best stuffed mushroom that has ever passed my lips.  Actually, if you ask me, I find them to be better than those from Olive Garden - high praise coming from someone that loves the OG as much as I do. 

Stuffed Mushrooms (like Olive Garden's)

12 or more fresh white button mushrooms (depends on the size of the mushrooms)
6 oz. can clams, drained and finely minced
1/4 cup clam juice (can be reserved from the canned clams or purchased separately - I used the bottled juice)
1 green onion, finely chopped
1/8 teaspoon garlic salt
1/2 teaspoon  minced garlic
1 tablespoon melted butter
1 teaspoon oregano leaves
1/2 cup Italian style bread crumbs
1 egg, beaten
2 tablespoons finely grated Parmesan cheese
1 tablespoon finely grated Romano cheese
2 tablespoon finely grated mozzarella cheese
1/4 cup grated mozzarella, for topping
1/4 cup melted butter, for topping
Optional - finely chopped parsley for garnish

  Begin by preheating your oven to 350°F.  Clean the mushrooms and remove the stems.  Save the stems for another use. (Sauteed in a little butter, served over rice is fantastic, if you ask me.)  Lightly grease a baking dish, and set aside.

  In a medium mixing bowl, mix together the clams, green onion, garlic salt, garlic, 1 tablespoon of melted butter, and oregano. Once that is well blended, add in bread crumbs, beaten egg, and clam juice.  Stir until it is well mixed, and stir in the Parmesan, Romano, and 2 tablespoons of mozzarella.  Stuff the mushrooms, slightly mounding the stuffing mixture.

  Place the stuffed mushrooms to the baking dish.  Pour the 1/4 cup of melted butter over the mushrooms, and cover the baking dish with aluminum foil.  Place the dish into the preheated oven to bake for 35-40 minutes.  Remove, sprinkle the 1/4 cup of mozzarella and return to the oven until the cheese melts.  Sprinkle with parsley before serving, if desired.

Notes- This dish is great for the holidays.  You can prepare the mushrooms and place in the baking dish (don't pour the butter over yet), cover with foil, in the morning.  Stash in the refrigerator until you are ready to bake them that evening.  Preheat the oven, then pour over the melted butter at this point and continue the recipe from there.  And pssst - I don't think too many folks would notice if you just use Parmesan for both the Parmesan and Romano.

Saturday, November 27, 2010

Chicken and Dressing Skillet Bake

This one's a winner, folks.  No, really!  When Sue Gulledge entered this recipe in the 1997 National Cornbread Festival, she took home first prize for the year.  And I can see why - the taste of good ol' fashioned cornbread dressing, but some of the work has been cut out for you.  Granted, it's not quite the same texture as that famed dish, but it certainly hits the spot.

Chicken and Dressing Skillet Bake
Yields 6 servings

Ingredients
1 cup chopped celery
1 cup chopped onion
4 tablespoons butter
1 tablespoon oil (I used canola)
2 cups buttermilk
2 eggs, beaten
1 (8.5 oz) can cream-style corn (I couldn't find one this small, so I used 2/3 of a regular can)
2 cups self-rising corn meal mix
2 teaspoons poultry seasoning
3 cups chopped cooked chicken, seasoned with salt and pepper (or shred a rotisserie chicken like I did)

  Start off by preheating your oven to 450°F.  On the stove, put a 10 1/4 inch cast iron pan on medium heat.  Melt the butter in the pan, and cook the celery and onion for about 10 minutes, or until they are tender.  Pour the cooked vegetables and butter drippings into a large mixing bowl and set the bowl aside.  Pour the oil into the skillet and put it into the oven to heat up - 5 minutes.

  Return to the mixing bowl with the celery and onions.  Add in the rest of the ingredients.  Stir until everything is well mixed.  Take the skillet from the oven, and carefully pour the cornbread batter into the hot skillet.  Return to the oven and bake for 25-35 minutes, or until the cornbread is golden brown.  Split the cornbread into 6 wedges.  If you want to, you can garnish with fresh sage and top with chicken gravy.  I thought the cornbread was pretty darn good as is, but some people enjoy their gravy, too.  

Sunday, November 21, 2010

Kitchen 101: Seeding a Pomegranate

  It was in Mrs. C's 7th grade reading class I had first heard of this 'exotic' thing, the pomegranate.  We were studying Greek mythology.  There's a story that explains the change of seasons - it had all the elements of a good read: a mother whose love transcends everything, a dark stranger, forbidden desire, and food.  Well, okay, maybe it wasn't a stellar read by our standards, but it stirred base emotions.  Demeter, goddess of fertility and vegetation had this beautiful daughter, Persephone.  Now we all know, that's a curse of doom for women - the Greek gods just could not resist a good lookin' woman.  Many tried to court Persephone, but Demeter didn't think any of them were good enough for her girl.  No sir.  None of 'em.  So, Demeter hid her off and left her picking flowers in the meadow, oblivious and innocent.  Bam!  The earth opened up and Hades, god of the underworld, erupted forth on his chariot, stealing away Persephone.  Demeter launched a full-scale search, and in her anger and sadness, the crops withered.  Eventually, Zeus grew tired of the mortals' cries of hunger and sent Hermes to fetch Persephone from Hades.  Wouldn't you know it?  Persephone had gotten hungry herself, and Hades tricked her into eating seeds from the pomegranate.  While she would return to her mother, she would come back to reside with Hades a month for each seed she ate, giving the world seasons.   Interesting story, but no way I could just pop a few seeds and be satisfied.  Poor girl must have been a twig.

  Pomegranates are an intriguing fruit - you eat the seeds, better known as arils.  They pop with a tangy, sweet and sour juice.  To harvest the arils, be prepared for some tricky business - but there is a way to do it with minimum fuss.

You'll need a cutting board, knife, a big bowl filled with water, colander, and some paper towels.

  Start off by finding the crown, the part of the fruit that looks like Jughead's hat.  Trim off the top 1/2 inch.  You will get a little juice spurting out on the cutting board.  Turn the pomegranate around, and trim off the bottom 1/2 inch.  You'll see parts of the aril pockets hidden inside the white pithy insides.  Take the knife and score sections all around the fruit, going from top to bottom.  Put the scored pomegranate in the bowl of water, and carefully start pulling the fruit apart, working underwater. 

Here's my pom after I pulled it into two halves.

 Working with a section at a time, take your fingers and work out the arils from the white part, again in the water bowl.  You'll see the white pith float to the top and the arils will sink to the bottom.  After you've freed all the arils, skim the top with a spoon or just pick out the stuff that's floating.  Pour the water and arils into your colander to drain.  Spread them out onto paper towels to dry a bit.  Move them to a plastic container, topped with a paper towel and seal.  Stash in the refrigerator, and these lil' rubies should last for 7-10 days.


Sunday, November 7, 2010

Pumpkin Pie Spice

  Some of you out there are taking inventory of your spice racks, making lists to prepare for the holidays.  If you've got these four spices, don't shell out for pumpkin pie spice.

Pumpkin Pie Spice
Yields 1 teaspoon

1/2 teaspoon ground cinnamon
1/4 teaspoon ground ginger
1/8 teaspoon allspice
1/8 teaspoon nutmeg

Mix together and use wherever pumpkin pie spice is called for.

Sunday, October 31, 2010

Hot Artichoke Dip

  We are wading into the holiday season, replete with good friends and good food.  Deep into football season, Thanksgiving is around the corner, which means Christmas and New Year's Day are hot on its heels.  Time to break out the appetizers - easier the better.  Today I'm sharing with you a recipe I found in one of my Taste of Home cookbooks awhile back.   

Hot Artichoke Dip
Serves 12 - Yields about 3 cups

1 cup mayonnaise
1 cup sour cream
1/4 cup grated Parmesan cheese
1/4 cup roasted red pepper, chopped (I used jarred peppers for this)
1 (14 oz) can artichoke hearts, drained and chopped
1 1/3 cup French fried onions, divided

  Start off by preheating your oven to 375°F.  Spray a 9 inch pie dish (or a 1 quart baking dish) with cooking spray.

  In a medium mixing bowl, stir together the mayonnaise, sour cream, Parmesan cheese, pepper, artichoke, and 2/3 cup of the French fried onions.  Spoon it into the pie dish and spread it out.  Bake for 25 minutes.  Remove from the oven and sprinkle the remaining 2/3 cup of onions on top.  Return the dip to the oven for another 5 minutes, until your onions are a nice golden brown.  Serve the dip with crackers or bagel chips.

Wednesday, October 27, 2010

Kitchen 101: Roasting Garlic

Ah, the Stinkin' Rose, and just in time for Halloween, to boot.  Garlic has a way of, shall we say, making an impression.  Me?  I love the stuff anyway I can get it.  But if you don't care much for garlic's pungency, try roasting it.  It brings a mellow and slight sweetness that is just heavenly - a contrast to the sharp bite of raw garlic.  Roasted garlic is versatile and downright tasty spread on toasted French bread.  And roasting is too easy not to give it a try.

For the tools of the trade, you'll need a head of garlic, olive oil, and aluminum foil. 

A head of garlic?  Sometimes it's referred to as a garlic bulb, covered in several papery layers of skin, a bit like an onion.  The small, individually wrapped nodules that compose the head are called cloves.  Got it?  Great!

For what we are doing today, we need to keep the head intact.  With a knife, cut off the top 1/4 of the head, exposing the clustered cloves inside.


Tear off a square of aluminum foil, and place the trimmed head in the middle.  Drizzle with just a little olive oil.


I find that olive oil from a cat dispenser tastes the best....but I'm weird that way.  (All kidding aside, the opaque container does protect the oil from light.)

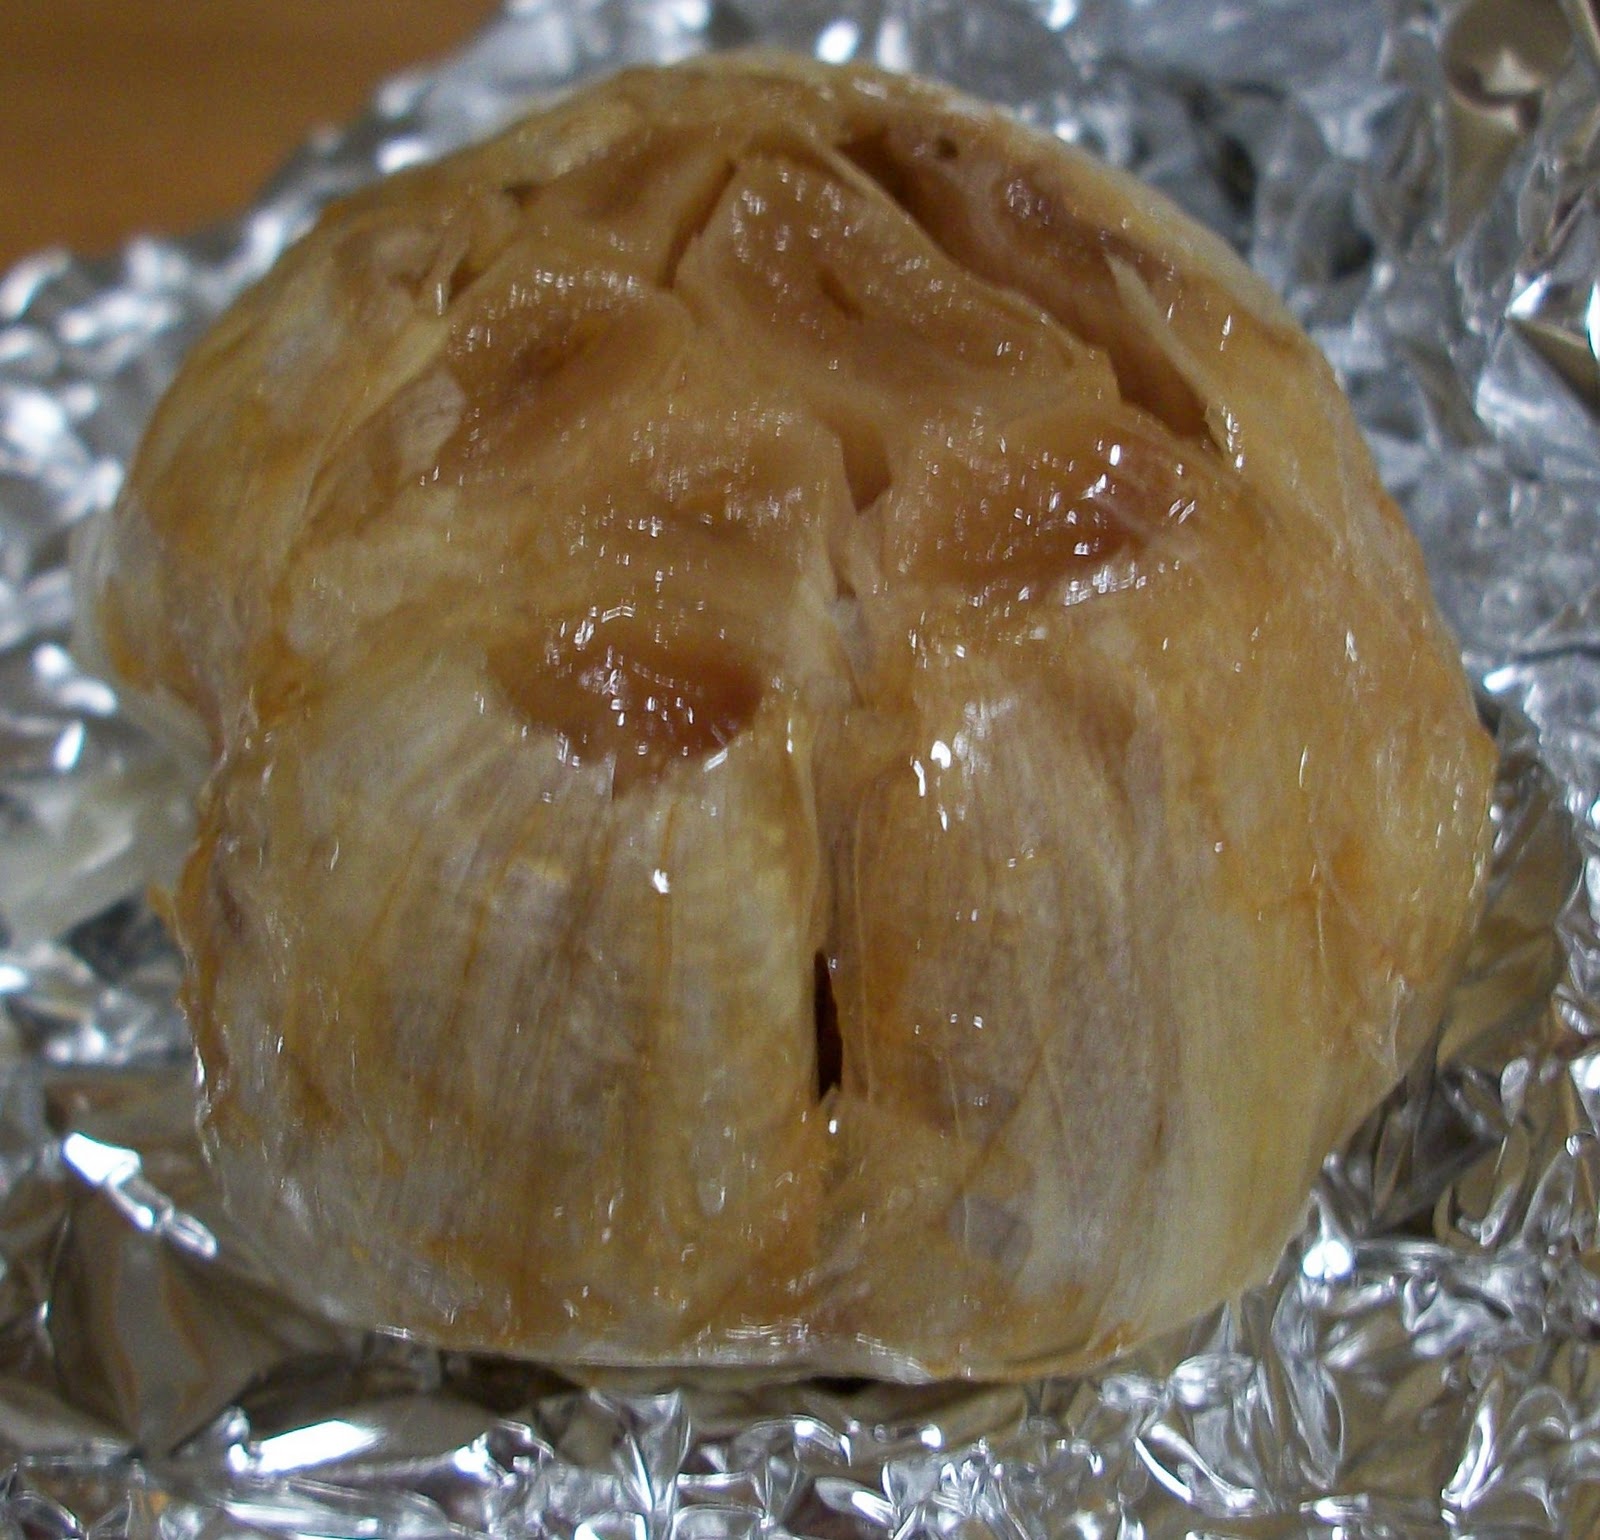
Wrap your garlic up tightly in the aluminum foil and pop into a preheated 350°F oven.  Bake for about an hour.  Remove and once it's cool, unwrap the head.  The cloves will be caramelized and brown in color.  The garlic has taken on a more mellow taste.  To remove the garlic, squeeze the head and the softened garlic will come out.


What's it good for?  Lots of delicious options - add it to mashed potatoes, make a garlic seasoning paste, squeeze it straight from the bulb and spread on toasted bread, and one of my favorite ways to use it is in a salad dressing.  And the roasting process I gave you is very flexible.  If I've got the oven going for something else - say baked potatoes- I just toss my foil wrapped garlic in on the rack to take advantage of that heat.  Cooking at a higher temp than 350°?  Just start checking your garlic at an earlier time.  I usually run about 30-45 minutes in a 400°+ oven for roasting.  Multiple heads going?  I've read other blogs where crafty cooks use a muffin tin and cover with foil; you don't have to retrieve multiple foil packs that way.  Just make sure to store leftovers in the fridge, covered with a bit of olive oil, and use within a few days.