Sunday, October 31, 2010

Hot Artichoke Dip

  We are wading into the holiday season, replete with good friends and good food.  Deep into football season, Thanksgiving is around the corner, which means Christmas and New Year's Day are hot on its heels.  Time to break out the appetizers - easier the better.  Today I'm sharing with you a recipe I found in one of my Taste of Home cookbooks awhile back.   

Hot Artichoke Dip
Serves 12 - Yields about 3 cups

1 cup mayonnaise
1 cup sour cream
1/4 cup grated Parmesan cheese
1/4 cup roasted red pepper, chopped (I used jarred peppers for this)
1 (14 oz) can artichoke hearts, drained and chopped
1 1/3 cup French fried onions, divided

  Start off by preheating your oven to 375°F.  Spray a 9 inch pie dish (or a 1 quart baking dish) with cooking spray.

  In a medium mixing bowl, stir together the mayonnaise, sour cream, Parmesan cheese, pepper, artichoke, and 2/3 cup of the French fried onions.  Spoon it into the pie dish and spread it out.  Bake for 25 minutes.  Remove from the oven and sprinkle the remaining 2/3 cup of onions on top.  Return the dip to the oven for another 5 minutes, until your onions are a nice golden brown.  Serve the dip with crackers or bagel chips.

Wednesday, October 27, 2010

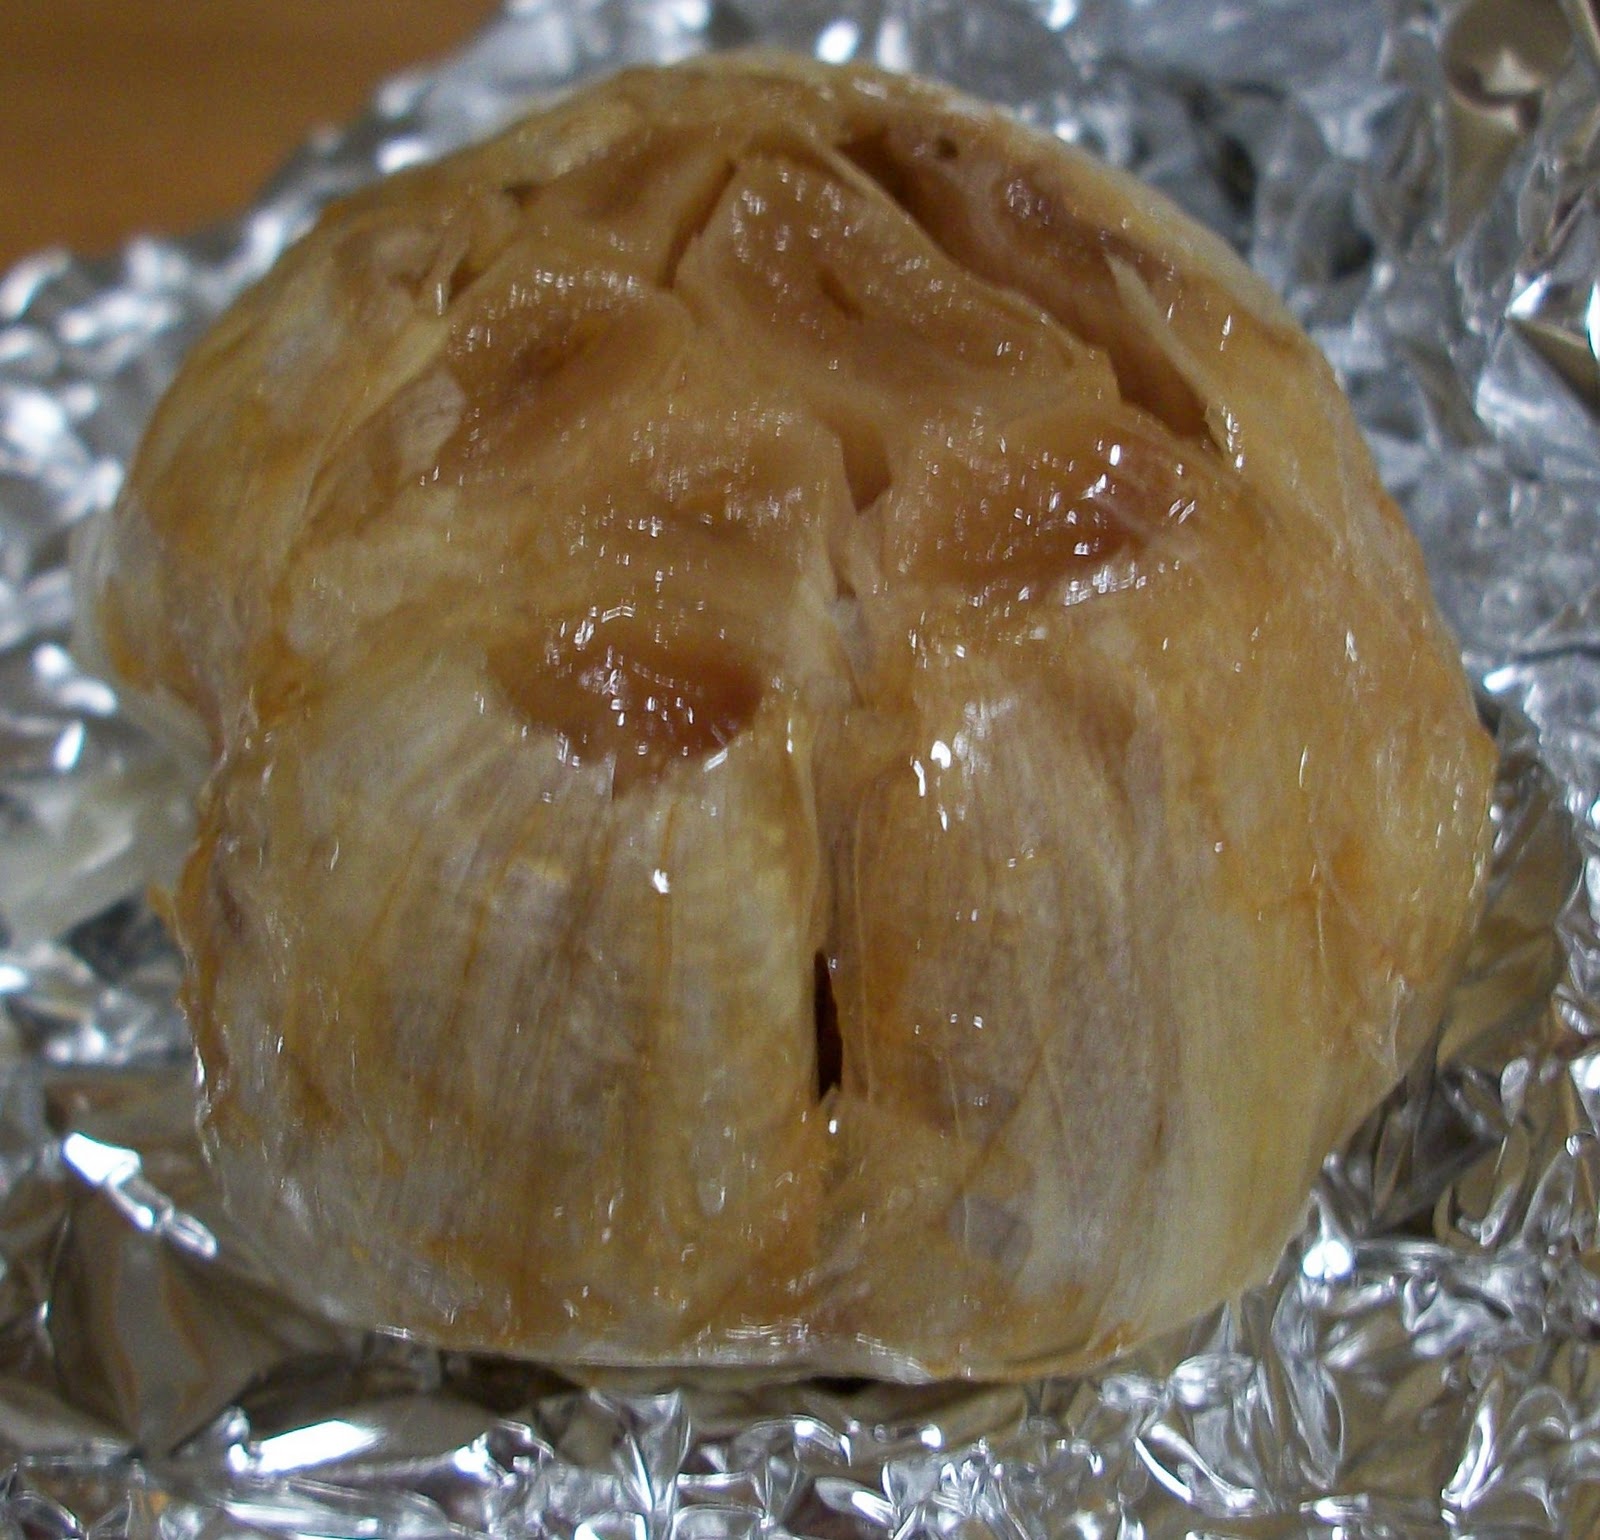
Kitchen 101: Roasting Garlic

Ah, the Stinkin' Rose, and just in time for Halloween, to boot.  Garlic has a way of, shall we say, making an impression.  Me?  I love the stuff anyway I can get it.  But if you don't care much for garlic's pungency, try roasting it.  It brings a mellow and slight sweetness that is just heavenly - a contrast to the sharp bite of raw garlic.  Roasted garlic is versatile and downright tasty spread on toasted French bread.  And roasting is too easy not to give it a try.

For the tools of the trade, you'll need a head of garlic, olive oil, and aluminum foil. 

A head of garlic?  Sometimes it's referred to as a garlic bulb, covered in several papery layers of skin, a bit like an onion.  The small, individually wrapped nodules that compose the head are called cloves.  Got it?  Great!

For what we are doing today, we need to keep the head intact.  With a knife, cut off the top 1/4 of the head, exposing the clustered cloves inside.


Tear off a square of aluminum foil, and place the trimmed head in the middle.  Drizzle with just a little olive oil.


I find that olive oil from a cat dispenser tastes the best....but I'm weird that way.  (All kidding aside, the opaque container does protect the oil from light.)

Wrap your garlic up tightly in the aluminum foil and pop into a preheated 350°F oven.  Bake for about an hour.  Remove and once it's cool, unwrap the head.  The cloves will be caramelized and brown in color.  The garlic has taken on a more mellow taste.  To remove the garlic, squeeze the head and the softened garlic will come out.


What's it good for?  Lots of delicious options - add it to mashed potatoes, make a garlic seasoning paste, squeeze it straight from the bulb and spread on toasted bread, and one of my favorite ways to use it is in a salad dressing.  And the roasting process I gave you is very flexible.  If I've got the oven going for something else - say baked potatoes- I just toss my foil wrapped garlic in on the rack to take advantage of that heat.  Cooking at a higher temp than 350°?  Just start checking your garlic at an earlier time.  I usually run about 30-45 minutes in a 400°+ oven for roasting.  Multiple heads going?  I've read other blogs where crafty cooks use a muffin tin and cover with foil; you don't have to retrieve multiple foil packs that way.  Just make sure to store leftovers in the fridge, covered with a bit of olive oil, and use within a few days.

Monday, October 11, 2010

Roasted Vegetable Spread

  Life gets hectic this time of year.  Meetings, responsibilities, and getting ready for all the upcoming holidays and events...meal planning is something I'm going to have to invest my time in.  This week, I'm planning out my lunches.  On the menu?  Fresh salads, fruit, and sandwiches.  Right now I'm roasting off some vegetables for one of my favorite sandwich spreads, a recipe from food geek - Alton Brown.

Roasted Vegetable Spread

Ingredients
1 small zucchini, sliced
1 red bell pepper, sliced into rings
1 onion, sliced and seperated into rings
4 garlic cloves, smashed and peeled
1 tablespoon olive oil
8 ounces cream cheese
salt and fresh ground black pepper

  Start by preheating your oven to 400°F.  Line a baking sheet with aluminum foil.

  Take the zucchini, bell pepper, onion rings, and garlic cloves and put them in a small mixing bowl.  Drizzle the veggies with the olive oil and mix them up until all the vegetables are lightly coated in oil.  (Clean hands are awesome for this job.)  Spread them out in a single layer on your prepped pan.  Put the pan in the oven and roast the vegetables for 30-45 minutes.  The time depends completely on how thin or thickly you sliced the vegetables.  You will need to pull them out and stir them occasionally.  They will be ready when you are getting brown edges on the food.  Keep an eye on that pan - there's a fine line between roasted and burnt.  Let the vegetables cool.

  In your food processor, combine the roasted vegetables and cream cheese.  Pulse until you reached the desired consistency.  AB likes his spread slightly chunky - and so do I.  I like seeing what's in there.  Season with salt and pepper to taste.

Notes:  If you are wondering which episode this recipe was featured in, it's "Sandwichcraft", season 8, episode #114. One of my favorite episodes, it was written to get families - adults and kids - together working in the kitchen.   Now before you think I'm off my rocker, no, I don't have the episode numbers memorized.  But I am a big fan with AB's new cookbook.  Being as meticulous, he has it divided by episodes with tons of info.

Sunday, October 3, 2010

Pepper Palace & Kyle Carver Orchard

  It has been a jam-packed weekend in my neck of the woods. Friday night, after work, I went to the National Storytelling Festival- as I told you last week. Saturday, my hubby and I got up and a drive up to Gatlinburg in the heart of the Smokies. We took the back way in, driving the roads through Cosby that sinuously wind through the mountains like a snake. It was a beautiful drive that will become even more stunning in the coming weeks as the leaves change. And the trip wasn't just eye candy - we experience a couple of places that must be shared with the masses, the Pepper Palace and Kyle Carver Orchard.

  The Pepper Palace - what can I say?  It lives up to its name.  The scent of pepper beckons you as you pass the store front in the Mountain Mall- not heat, but the pure essence of pepper that is utterly inviting.  On the left as you enter, you'll find numerous trophies and ribbons for many of their award-winning sauces and salsas - several you'll find on this list.  Not only do they carry their own house brands, but any kind of hot sauce you could want.  Curious about the heat level?  Check the shelf. The sauces are rated for your taste buds.  There are sample bars to try many of the sauces, and samples using their products.  I walked out with my favorite, Southern Peach and Vidalia Onion, slightly sweet and of medium heat, and my hubby's pick - Autumn in the Smokies, a good, solid medium heat sauce that screams buffalo wings.  But if you aren't a chile head or a hot sauce connoisseur, don't despair.  The Pepper Palace has tons of BBQ sauces, marinades, rubs, salsas, and dip mixes.  But what impressed me the most was the fact you could tell the folks that worked there loved what they did.  They were extremely friendly, encouraging customers to try samples and assisting them in the floor with their impressive product knowledge.

  On the way home, we stopped at Kyle Carver Orchard, or as locals refer to it - Carver's.  A sprawling orchard that grows apples, peaches, grapes, and vegetables, Carver's has a candy store, barn market, and the Applehouse Restaurant.  This was my first time eating at the Applehouse, but it will not be my last.  We were greeted by a very professional hostess, who was 9 at most (filling in for the busy hostess, she did not want to see us waiting), but undoubtly the next generation to run the orchard.  She promptly requested us to follow her, and seated us next to one of the windows that looked out over the apple trees, heavy with fruit. 
The meals were served with a small glass of apple cider, a basket of apple fritters - hush puppy-like critters with finely diced apples, and apple butter.  Mmmmmm....apple butter.  I can't think of a thing that wouldn't be better dunked in that apple butter.  As you can see, I came home with a jar.  After a wonderful meal, we headed over to the barn where I snagged the apple butter and honey.  Boy, the apple cider was tempting to get, but I needed a reason to go back soon.  Curiously, among the many items they had made from the things they grow there, there was a hot sauce made with peaches and Vidalia onions, like I picked up from the Pepper Palace.  I just might have to do a comparison between the two sometime.

Notes:  Need some place to feed your hot sauce needs?  You can find the Pepper Palace at www.pepperpalace.com or on Facebook.  Carver's doesn't have a website, but they, too, have a Facebook page.

Sunday, September 26, 2010

Muddy Buddies

  This week, I'm heading over to Jonesborough for a special event at the National Storytelling Festival, the Ghost Stories concert.  Jonesborough has the distinction of being Tennessee's oldest town, formed even before statehood.  It's a lovely small town with many historic sites, and of course, storytelling.  The weekend of the festival, this little place bursts at its seams, literally.  Quaint and unique shops have lines out the door, and the ice cream parlor is packed tighter than a scoop in a cone.  A few co-workers and I have a tradition of trekking over for the ghost stories.  Outside, around the gazebo where the tellers take the stage, we huddle under our blankets and share snacks.  Last year, I brought the ubiquitious Muddy Buddies, or probably better known in some parts as Puppy Chow - a sweet Chex® Mix with peanut butter and chocolate.

Muddy Buddies
Serves 18

Ingredients
9 cups of Rice, Corn, or Chocolate Chex® - any combination of the three
1 cup semisweet chocolate chips
1/2 cup peanut butter
1/4 cup butter
1 teaspoon vanilla extract
1 1/2 cups confectioners sugar

  First off, pour the cereal into a large bowl; set aside.

  In a small microwave safe mixing bowl, combine the chocolate chips, peanut butter, and butter.  Microwave on high for 1 minute, and stir.  Microwave for an additional 30-40 seconds or until mixture can be stirred smooth.  Stir in the vanilla.  Pour the chocolate mixture over the cereal and stir until everything is evenly coated.

  Pour the chocolate coated cereal into a large (2 gallon) resealable plastic bag.  Pour in confectioner's sugar.  Seal and shake until the cereal is well coated.

  Spread it all out onto waxed paper to cool.  Then store the mix in the refrigerator in an airtight container.

Notes: If you'd like to find out more about where I'm heading, check out these links:
http://www.storytellingcenter.net/festival/
http://www.storytellingcenter.net/festival/special-events/ghost-stories/

Sunday, September 19, 2010

Peanut Butter Ice Cream

I know, it's almost the Autumn Equinox, and I'm posting another ice cream recipe.  But, it's peanut butter!  Gooey, rich, comforting, and that's what we look for in fall food.  I came across this recipe in The Best Ice Cream Maker Cookbook, written by Peggy Fallon.  This ice cream is a rich custard based dessert.  Custard bases have eggs, but they are cooked, giving it a creamy, rich texture.  The taste is very reminiscent of those peanut butter balls your grandmother makes at Christmas, or if you've ever enjoyed a peanut butter shake down at Sonic. 

Peanut Butter Ice Cream
Makes 1 1/2 quarts

2 cups heavy cream
2 cups milk
3/4 cup sugar
1 packed cup creamy peanut butter
2 egg yolks
2 teaspoons vanilla extract

  Begin by combining the cream, milk, and sugar in a heavy medium saucepan. Cook over medium heat. Stir until the sugar dissolves and the mixture is hot, about 6-8 minutes.

  Add the peanut butter in large spoonfuls, mixing well after each spoonful, until the peanut butter is melted and everything is smooth.

  In a separate bowl, whisk the egg yolks. Temper the egg yolks by slowly whisking in 1 cup of the peanut butter mix. Add the egg mixture back into the pot, and reduce the heat to medium-low. Cook and stir until it's thick enough to coat the back of a spoon. This should take around 5 to 10 minutes. Take care not to boil or the egg will curdle.

  Strain the custard base into a bowl and let it cool for 1 hour at room temperature. Stir in the vanilla extract, cover, and refrigerated for at least 6 hours. (The base will keep for 3 days in the fridge.)

  Pour the mixture into the ice cream maker and freeze according to your maker's directions. Transfer to a covered container and freeze for at least 2 hours before serving.  This additional freeze time is called ripening and does a lot for the flavor and texture.

Notes: This recipe is very forgiving.  Usually for homemade ice cream, you'll want to use whole milk for the fat content.  But this recipe, I used skim milk since I was already using heavy cream, and I forgot to pick up whole milk while I was at the store.  (Hey, at least I'm honest.)  The peanut butter was another total happy accident.  I grabbed whipped creamy peanut butter, which was 1/3 less sugar, and it still came out exquisitely rich with no adjustments to the sugar.  But you should know that Ms. Fallon says to use only commercial peanut butter and not the natural kind you can grind yourself, because it will separate in your ice cream.

Tuesday, September 14, 2010

Dairy Hollow House Skillet-Sizzled Cornbread

There is something so utterly satisfying about flipping a still hot skillet and a round of cornbread cleanly falling away onto a plate.  Tonight's supper was pot roast and this cornbread.  A little bit southern (buttermilk and cast iron), a little bit northern (yellow cornmeal and a tad of sugar), The Cornbread Gospels by Crescent Dragonwagon features this recipe.

Dairy Hollow House Skillet-Sizzled Cornbread
Makes 8 wedges

Ingredients
1 cup unbleached white flour
1 cup yellow cornmeal, stone ground preferred
1 tablespoon baking powder
1/4 teaspoon salt
1/4 teaspoon baking soda
1 1/4 cups buttermilk
2 tablespoons sugar
1 egg
1/4 cup canola oil
2 tablespoons butter

  Start off by preheating your oven to 375°F.

  Sift together the flour, cornmeal, baking powder, and salt in a large mixing bowl.  If you don't have a sifter, you can do this in a food processor, or fluff and mix everything gently with a fork.

  In a medium sized mixing bowl, whisk together the buttermilk and baking soda.  Add in the sugar, egg, and oil, taking care to whisk everything together evenly.

  Over medium heat, melt the butter in a 10 inch cast iron skillet.  When the butter has melted completely, swirl it around, completely coating the bottom and up around the sides.  Once the skillet is ready, pour the wet ingredients into the large bowl with the dry ingredients.  Mix everything up with as few strokes as possible, and scrape into the hot skillet.  Bake in the oven for 20 minutes.  Let the bread cool a few minutes, flip onto a plate and slice into wedges.